 0118 948 1610
A few weeks ago I was joined by Gini Temple from @the_picturegallery to demonstrate to her how we make her hand painted picture frames in our workshop. We went through the whole process on a beautiful oil painting of ballerinas which I understand Gini has now sold.
Step 1 – Choosing a picture frame
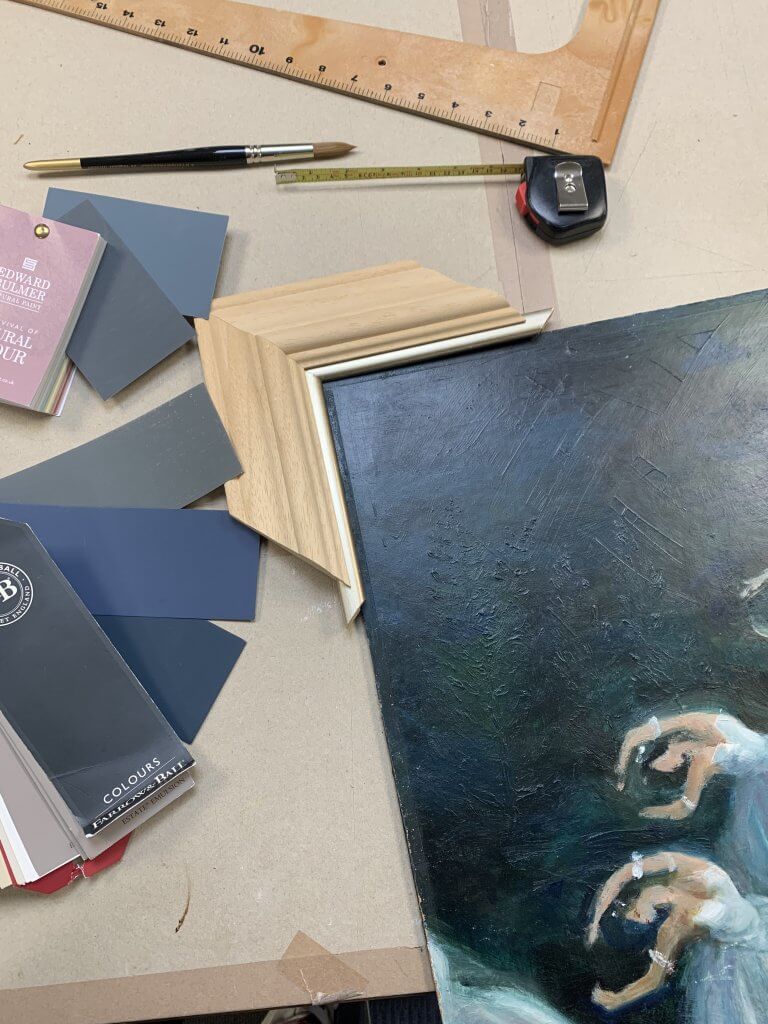
This is always the fun bit, but also in many ways the trickiest as we try and choose a new style for each artwork which works in harmony with the image. It is the core of our service as framers to add style and finish to make each picture look its best. We aspire to always lift the work by adding to its colours, movement, texture, and composition, keeping in harmony with its features so that they radiate pleasure and emotion from the wall to the eye, and bring joy to the heart.
In this case we took off an old scruffy frame which was smothering the artwork. After much deliberation we chose a champagne gold slip and a hand painted Inchyra Blue frame from the Farrow & Ball palette that we use. It was a little bit of a departure from the norm for Gini who would usually have a hand painted slip as well, but this time we just needed that extra bit of bling to balance the overall composition.
Step 2 – Remeasuring the work and cutting the frames
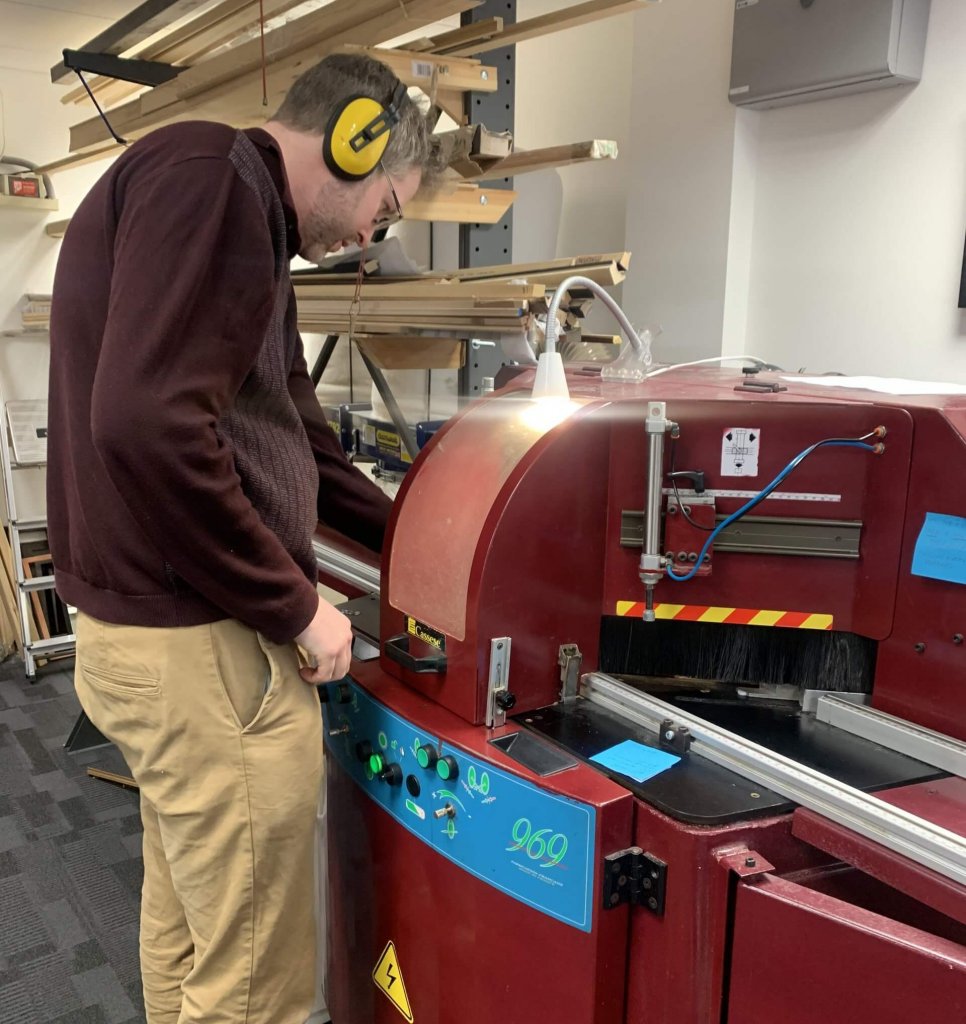
It is always important to check measurements. We almost go cross eyed sometimes double and triple checking before cutting materials. We cut the champagne gold slip first. Once this is joined we then remeasure and cut the outer frame.
All of our frames in our workshop are cut on this impressive Cassese Mitre saw which produces beautiful precise 45 degree cuts, and only 45 degree cuts (fantastic for a picture framer if not for anybody else).
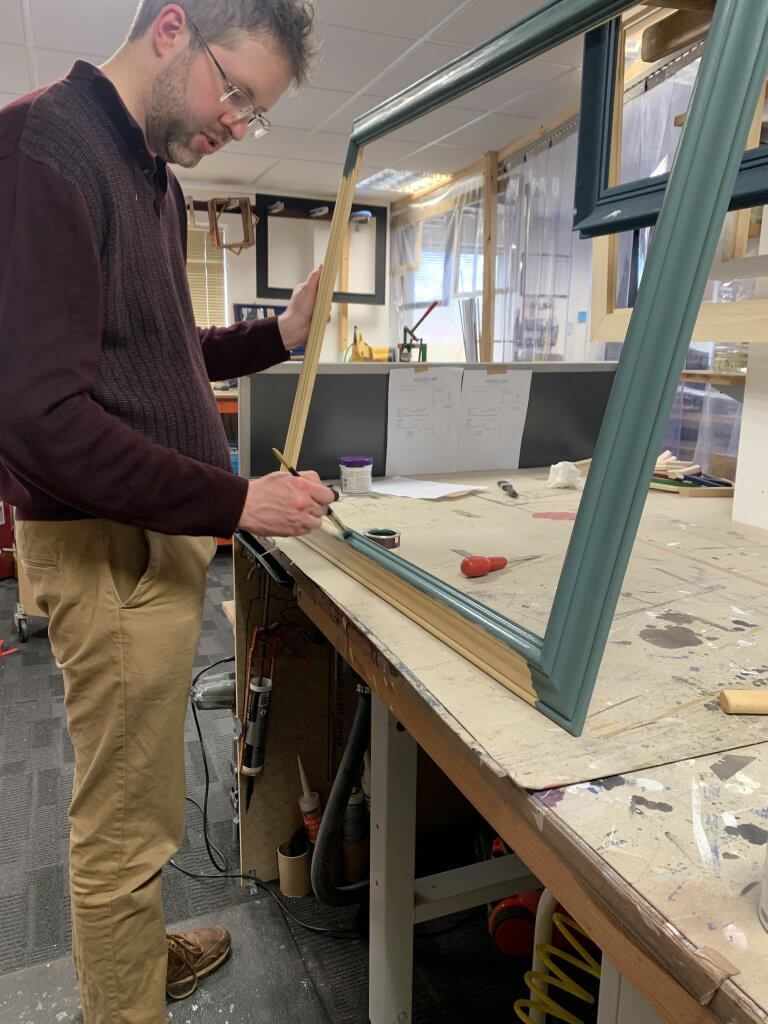
Step 3 – Joining the frames
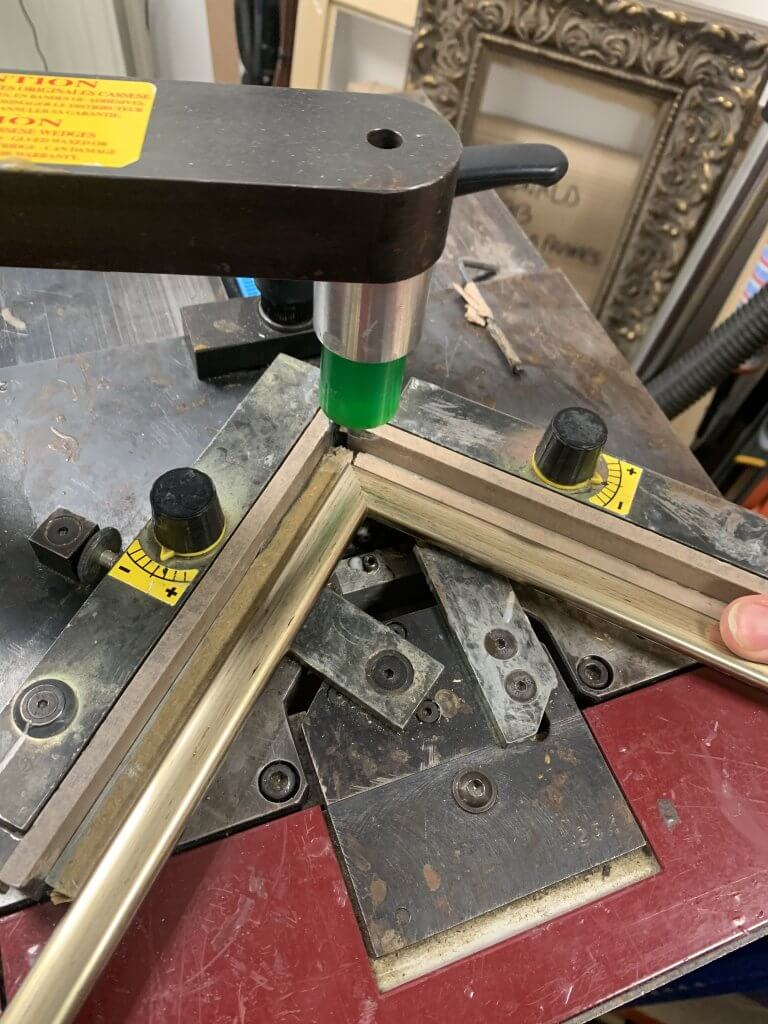
The setup for joining can be a little tricky if the moulding is a complex shape . However, in principle you meet the corners together in a special clamp to make the 90 degrees. Add a little glue and drive v nails (metal wedges) into the back of the joint to fix the corners together while the glue dries. Our underpinner currently does about 100 frames per week like this.
Step 4 – Prep for painting
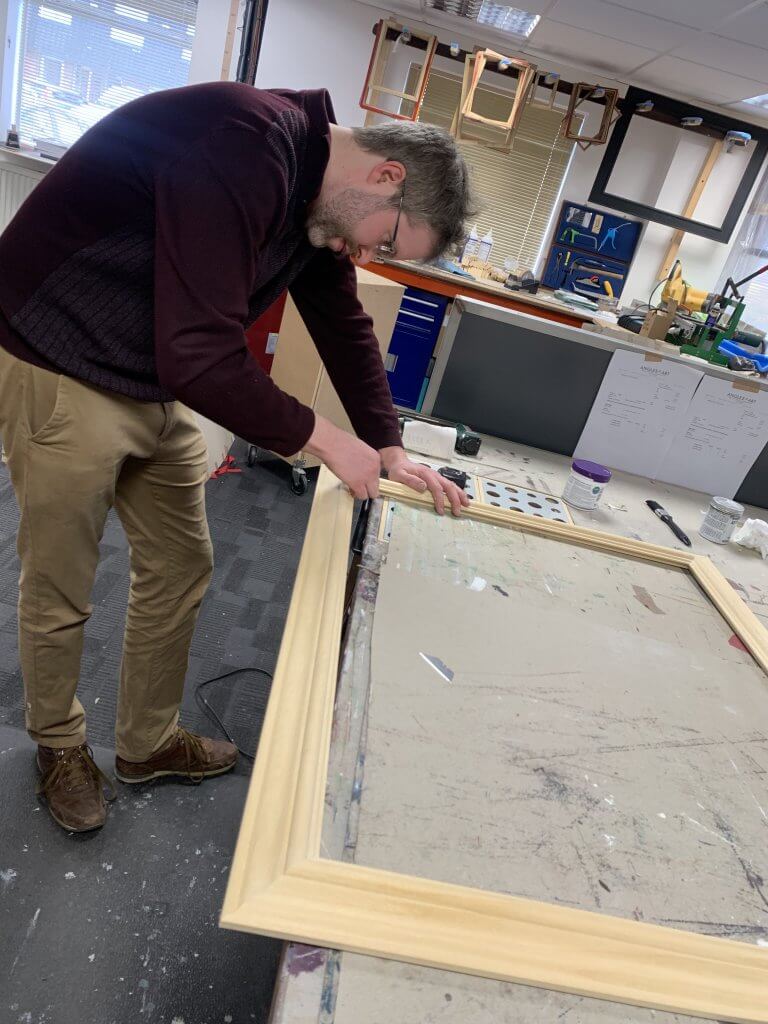
The slip was a pre-made champagne gold so this has already gone through to the fitting area. The other frame has the corners filled and sanded. Due to the shape of the moulding, this was all done by hand which can take a bit of time.
Step 5 – Painting
We always hand paint with a brush in our workshop because this gives the most wonderful final finish. To paint this frame took 3 coats with a light sand between each one. This is by far the most time consuming part of the job but the finish is always worth the wait. After painting, we then age the frame slightly before applying a crystalline wax to protect the finish. Sometimes we will varnish instead if we want a higher sheen or gloss for the particular look we are trying to achieve.
Step 6 – Fitting
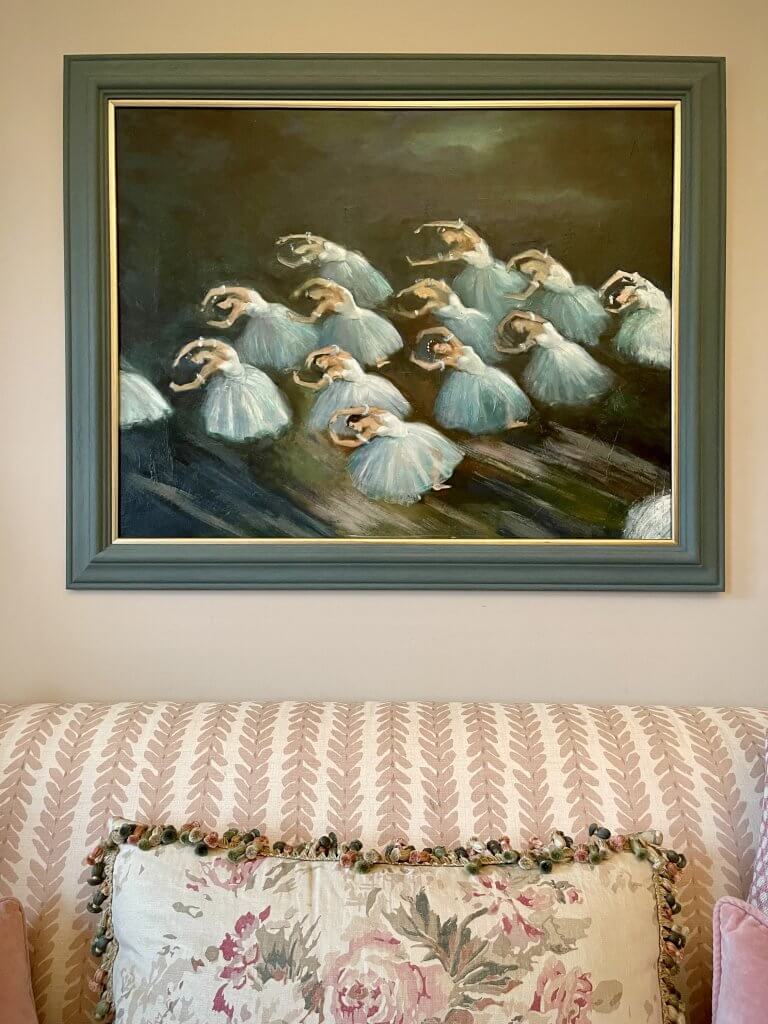
Lastly, everything is put together, finished off and the transformation is complete. A stunning artwork fit for any wall!
Gini has a beautiful collection of works on her website and I am pleased to say I have had the pleasure of helping her to frame many of them. If you are looking for traditional artworks her collection is worth a look at. For more contemporary work have a look at our online store or pop in to one of our galleries. We would also be delighted to help you choose the perfect frame for your own art.